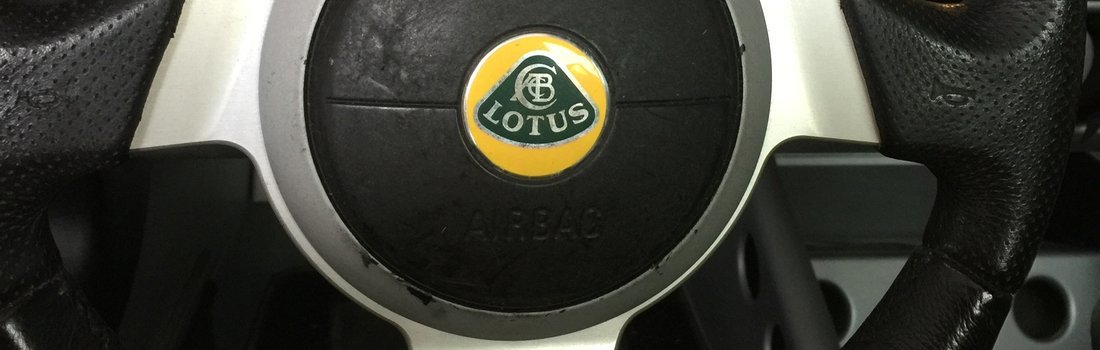
Resurface The Air Bag Cover on a Lotus Elise
An all-too-common problem experienced by Lotus Elise/Exige owners:
The driver-side airbag cover has become a sticky, disfigured mess - looking a bit like a worn hockey puck. It appears the original rubber coating simply doesn't hold up over time. There are several theories as to why: Improper use of cleaning solvents, UV damage, and others. But whatever the cause, the horrific results stare you in the face every time you slide into the cockpit of your otherwise exquisite little run-about.
Restoring the cover to a proper appearance is quite simple, really. After a bit of prep work, this fix uses Performix (tm) PlastiDip to restore the surface appearance. Allowing for overnight drying, the repair takes 2 days to complete, and requires only very basic mechanical skills.
Note: I chose to cover the silver surrounding ring with the PlastiDip - I prefer the look to the original. If you want to retain the silver, recommend you start the refinishing (Step 9) by spray painting and clear coating the ring first, then mask the painted ring or simply trim off the excess PlastiDip on the ring.
So let's get started.
- Wrench or socket set - To disconnect the car battery
- Allen wrench - to remove the airbag. Use the wrench from your Lotus tool pouch, if you still have it
- Sanding paper (800/1000/1500 grit) - to remove the old coating
- Paint thinner / Isopropyl alcohol or similar - to remove old coating
- Masking tape and paper - while spraying the new surface material
- Black Performix PlastiDip 'dip' (as shown) or Black PlastiDip Spray
- X-acto knife or equivalent - for trimming the PlastiDip
- Optional: Plastic Blade Scraper
- Optional: Preval Spray System or similar paint sprayer (available from Home Depot, Amazon)
- Optional: Paint thinner - to thin the 'dip' formula for spraying

Removing the Air Bag
The car battery MUST be disconnected before attempting to remove the air bag. Failure to do so may result in inadvertent detonation of the air bag and personal injury. Simply Put: Do not attempt this repair if you cannot remove power to the air bag.
To disconnect the negative cable post on the battery:
- Open the rear engine lid and unsnap the floor cover fasteners near the battery.
- Use the Allen wrench from the Lotus tool pouch (or equivalent) to remove the battery retaining bolt and foot plate.


- Remove the plastic battery cover by pulling / wiggling it forward, and set aside.
- Use a wrench or socket set to loosen the negative (black) cable. Mine used a 13mm socket.
- Detach the negative cable and set it away from the battery post.

With the car battery now disconnected, we're ready to safely remove the air bag.
- The air bag has 2 retaining bolts on either side of the steering wheel. Use the smaller Allen wrench from the Lotus tool pouch (or equivalent) to remove them.


Grasp the air bag and slowly pull it out of the retaining cradle. At this point the bag mechanism is still cabled so do not attempt to pull it excessively - just enough to orient it for cable removal (see video clip below).
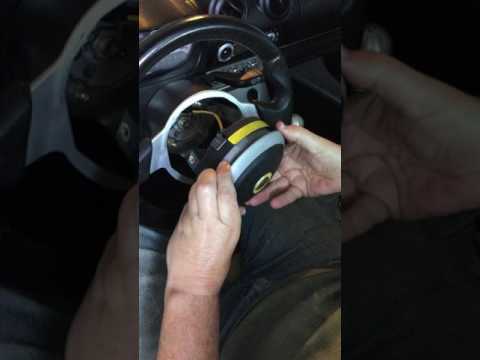
To disconnect the control cable from the air bag, pull out the green retaining clip from the top of the connector, then pull up on the connector assembly (see video clip and image below).

Stripping Off the Old Air Bag Cover
Protect the center Lotus badge from damage by covering with masking or electrical tape. Trim away the excess tape with the Xacto knife.

Starting with coarse (800 grit) sandpaper, sand both the outer ring and the rubbery center by hand. Wipe the residue with Isopropyl alcohol or paint thinner and repeat the cycle until the old paint and rubber surfaces are completely removed. As the old coatings get thinner, switch to a finer (1500 grit) sandpaper to remove the last remaining bits and obtain a smooth finish.
Note 1: For the painted outer ring, we found it easiest to use a plastic scraper to remove the bulk of the paint, then finish with the sanding/wiping method.
Note 2: Apparently on some cars, the underlying plastic surfaces are gray, providing a nice, high color-contrast to help you determine if you have all the old rubber coating off. This was not true on my car. The underlying plastic was nearly the same color as the rubber coating, so a close examination was necessary to determine when the rubber coating was fully removed. At any rate, just keep iterating the sanding/wiping cycle and eyeballing for any residual material.


Refinishing the Air Bag Cover
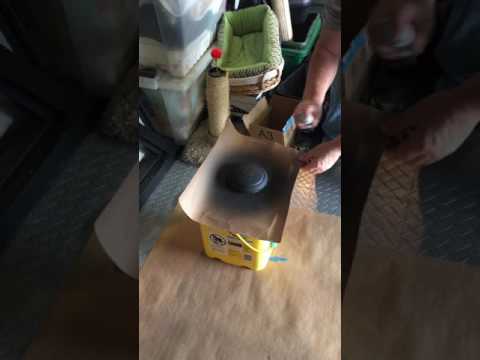
Set up a clean area for spray painting. Prepare masking paper to protect the air bag mechanism under the cover from overspray. Don't worry about the center Lotus logo, the PlastiDip will be trimmed away from it later.


Pour a 50/50 mixture of PlastiDip and Paint Thinner into the sprayer, cover and mix thoroughly. Attach the aerosol sprayer and test the spray quality on a scrap surface before attempting to spray the air bag cover. The first 1 or 2 sprays will likely be a bit light and inconsistent. Once it's spraying satisfactorily, apply a light first coat to the air bag cover.
Note 1: The first coat seems to hardly make a visual difference, and that's ok. Don't be lulled into applying too much at once!
Let dry for 30 minutes and repeat. I applied a total of 6 coats in 1/2 hour intervals.
Note 2: In-between sprays, I chose to remove the sprayer from the PlastiDip container, cover the container, and tap the residual liquid out of the sprayer tub. I did this as a precaution to keep it from clogging. This may not be necessary, but I did it 'just in case'.
Once you're happy with the spray results, set the air bag cover up to dry overnight before installation.


Final Prep and Installation
Once the cover has dried overnight, use the Xacto knife to carefully score the edges of the PlastiDip surrounding the center Lotus logo button. Gently lift and pull back the excess PlastiDip material as you go.


When installing the air bag in the car, use a clean rag to protect the new surface from scratches.
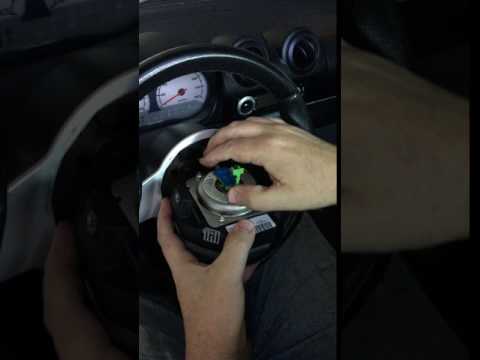
With the car battery still disconnected, plug in the control cable and insert the green plug on the top. Twist the air bag around and insert into the steering wheel cavity.
Note: The control cable only goes in one way - if it won't plug in, simply flip the air bag (or connector) around 180 degrees and try again.
Visually align the bolt holes and insert and secure the 2 Allen bolts.


Addendum: With the airbag cover now looking new again, it wasn't long before I decided to replace the 10-year old Lotus center badge, which now looked a bit out of place against the refinished cover. Obviously it's easiest to do this before you paint the cover. But you can still make the swap after painting if you're careful. You can obtain a replacement button from Lotus suppliers, or alternatively purchase a non-OEM badge from a third-party provider. The original badge is aluminum with four retaining tabs. It can be removed by carefully lifting the edge of the button. I used a metal probe to get access to the edge, then a plastic pry tool to lift it off. The images below should give you a better idea as to how the factory badge is attached.


Once you've finished installing the air bag, it's safe to reconnect the negative terminal on the car battery (Also a good time to check the water levels in the battery cells, if applicable).
Reset the time on your head unit, and take it for a drive!
Final Note: This air bag cover restoration procedure was sourced from fellow Lotus owners and contributors who posted their experiences and recommendations on lotustalk.com. I gratefully acknowledge their collective contributions to this guide.
There are 1 Comments.
Say Something.Rob, when you put the new emblem on I presume it's impossible to get the metal tabs to curl back under like original. Did you shorten them before install? did you use any adhesive to retain it? Thanks, Jeremy
You have to log in to comment...
We'll publish your comment after you're logged in.
Written by:RobT
Related HowTune Articles
Written by:iturgeon
Clean the MAF Sensor
Written by:iturgeon
Upgrading the Rear View Mirror
Written by:iturgeon
Replacing the Clutch
Written by:iturgeon
Replace the Shocks And Springs
Written by:mwehnes
Install the Moroso 20970 oil pan
Get notified about new articles.
We don't sell or share your info.