Replace The Air Filter on a Mazda3 2.3
Replacing the air filter on a 2.3l Mazda 3 is not very difficult, but not as easy as it should be. There are a few plastic panels and covers in the way. This article covers changing air filters on 2005, 2006, 2007, 2008, and 2009 model years. In 2010 the 2.5 liter engine update changed some of the plastic on the right side of the engine bay - making it easier to change the filter.
You should check your air filter approximately every 10,000 miles. When it the filter material is mostly dirty, it's time to replace the filter (or clean it if you have a K&N)
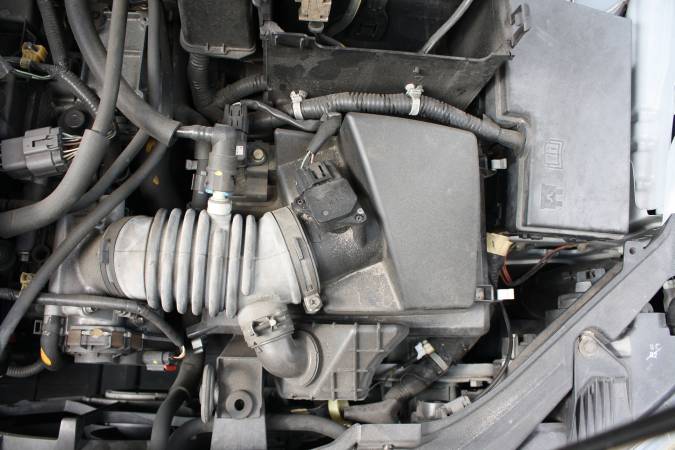
Locate the Air Filter Box
Remove Plastic Trim Panel
The stock air box on a Mazda 3 has several components over it. We'll have to remove those to get to the air filter. First up, remove this plastic cover. It uses 3 plastic fasteners.
Remove Battery Box Top
The battery box top has to be removed to gain access to the intake. It has 3 plastic clips near the front that hold it in place. Squeeze them together to release the lid.
Remove Battery Box Vent
This tube is directly over the air filter box. Now that the battery box lid is out of the way, you can remove it. Lift up the rear and pull it towards the back of the car.
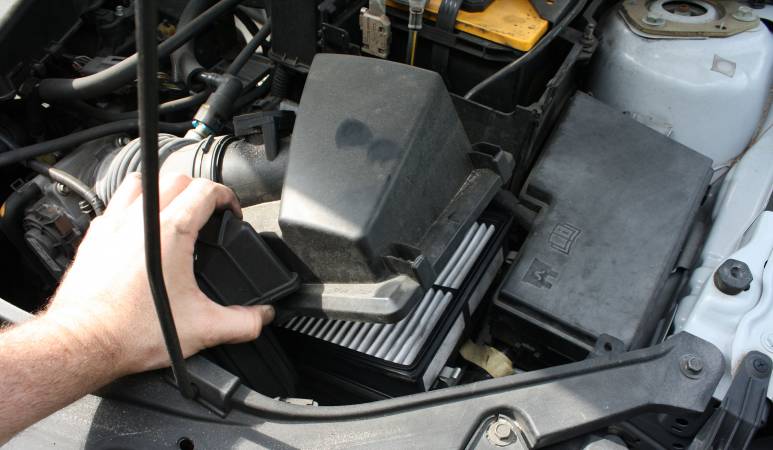
Remove Dirty Air Filter
Inspect the Air Filter
Inspect the air filter for dirt. This one isn't terrible yet, but it won't hurt to replace it now.
Install A New Air Filter
Carefully position the intake box lid over the filter (mine wanted to grab onto the filter's rubber gasket near the engine). To make it easier, I lifted slightly on the engine side of the box, positioned the lid, then closed the box lid in place.
Re-clamp the 4 metal clamps at each corner. If they are too difficult to close, then your air filter is not installed correctly or the box lid is not lined up. Reposition and try again.
Re-Install Battery Vent Tube
Slide the front of the battery vent tube in place. Note that it has a slot in it to for alignment. Place the back edge on the lip of the battery box.
Install Battery Box Top
Slide the rear tabs of the battery box into place, and clamp the battery box down in front by pressing it closed. The vent tube should be trapped in place by the box.


There are 0 Comments.
Say Something.You have to log in to comment...
We'll publish your comment after you're logged in.
Written by:iturgeon
Related HowTune Articles
Written by:iturgeon
Changing the Oil
Written by:iturgeon
Cleaning the MAF Sensor
Written by:iturgeon
Replace the Headlight Bulb
Written by:iturgeon
Replace the Roof Mounted Radio Antenna
Written by:iturgeon
Replacing Spark Plugs
Get notified about new articles.
We don't sell or share your info.