Changing The Oil on a Mazda 3 2.3L
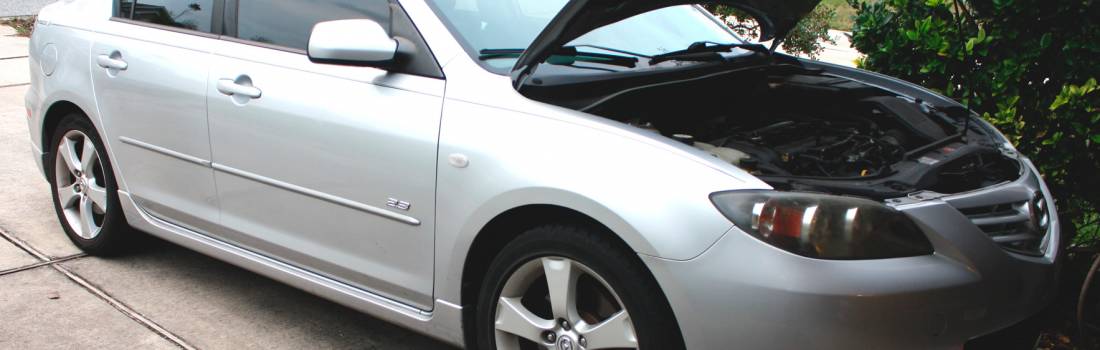
Changing your own oil makes you a self-reliant hero. It's easy, I promise.
Official Mazda 3 Oil Maintenance Schedule:
- Change oil every 7.5k mi. / 12k km.
- Change oil filter every 7.5k mi. / 12k km.
Mazda calls for 5W-20, and there are quite a few options in this range from regular oil to synthetics. I use Mobil1.
Summary of Mazda 3 oil change steps
- Oil Filter Wrench Like this one: Amazon.com
- Rhino Ramps
- Ratchet Set with 10, 17mm sockets
- Oil drain pan
- Small flathead screwdriver
- 6mm hex allen key
- 4.5 quarts of 5W-20 Oil
- Oil Filter: Mobil 1 M1C-153, K&N HP-7013 & PS-7013, Mann ML 1019, Purolator PL15505
Raise the Front End of the Car
Using ramps or a jack and a jack stand, raise the front of the car off the ground to gain access to the oil pan and filter. I prefer ramps because they are generally less work.
If you're using jacks stands, you can get away with only using one on the passenger side, under the rear A-Arm mount.

Drain the Oil Pan
Move your drain pan under the car. The oil pan drain plug is located at the rear of the engine, closer to the passenger side.

Remove the Plastic Belly Pan
The belly pan has 7 x 10mm hex bolts and 2 plastic fasteners that keep it in place. Remove those and set the pan aside. You have to take off this panel to get to the oil filter.
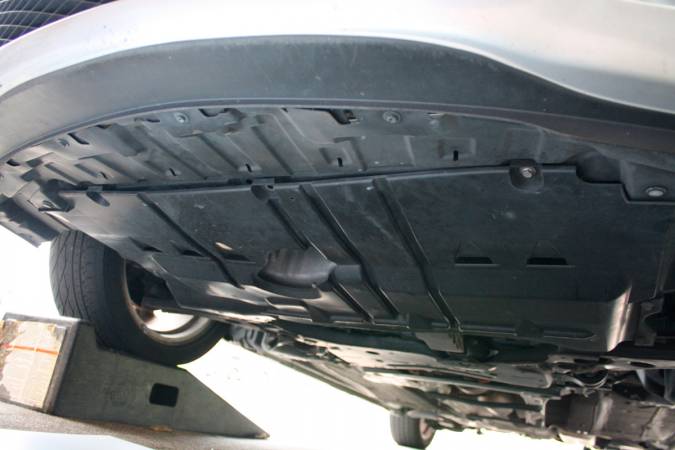
If you want to save time on your future oil changes, extend the service hole in the belly pan so that you can remove the oil filter w/o removing the panel.
I used a Dremel, but just about anything including a box cutter will work. Just make sure it's smooth enough that you don't cut up your hand next oil change.

Drain and Remove the Oil Filter
Remove the 6 mm allen key oil filter drain plug. It's in the center of the oil filter housing cover.
Letting oil drain here will lessen the mess you make later when you remove the filter. Yea, I said lessen, it's going to make a bit of a mess no matter what.

Now remove the entire oil filter cap using a stamped oil filter "wrench" like the one pictured below. Loosen the cap until you can turn it by hand. Keeping your drain pan under the filter housing.
At some random point the housing will start to gush oil remaining in the filter. Prepare yourself. I usually leave the center plug out at this step, so that it will funnel most of the oil out the bottom instead of the sides. However doing this, requires you only loosen the housing cap with the tool, then continue by hand.
At any rate, you're going to make a bit of a mess.


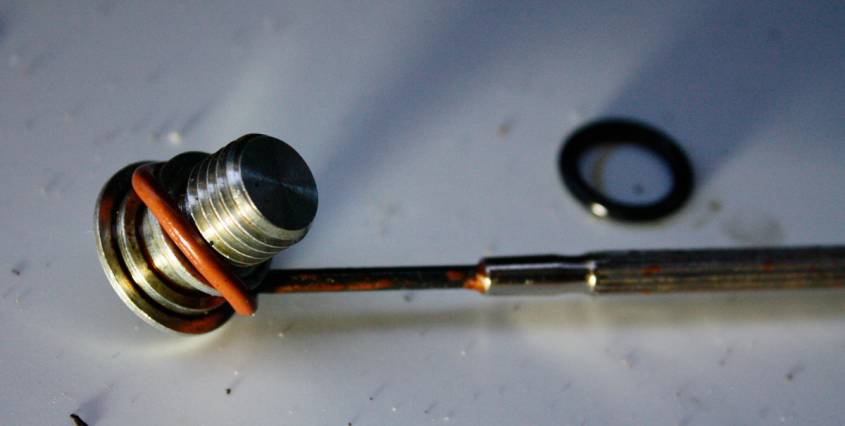
Install New Filter Housing O-Rings
Remove the o-ring on the filter housing drain plug.
The cartridge type filter used on the Mazda 3 always comes with two o-ring seals so that you can replace the old ones. Honestly, they don't have to be replaced that often (I've skipped replacing them for several oil changes), but it's good insurance and they are easy enough to swap out.
The smaller one on the drain plug is the tighter of the two. You can use a flat head or any other small prying device but be very gentle, take care not to scar surfaces with your tool.
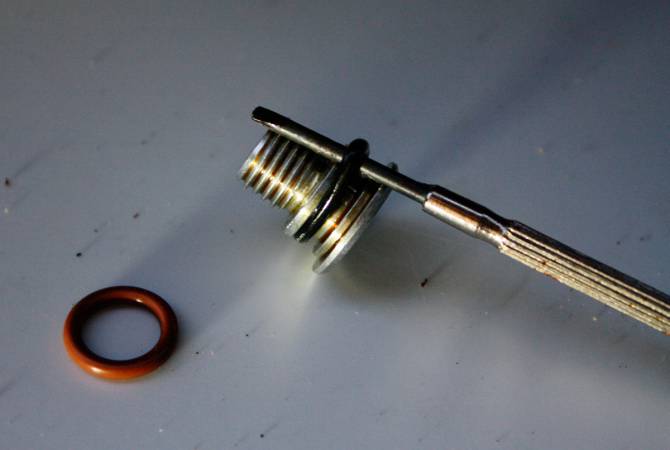

Install the new o-ring on the drain plug. I used my small screw driver to get the seal over the lip on the plug. Careful again, to not scratch any surfaces of the plug or the o-ring.
Install a New Oil Filter

Screw the housing back onto the car. Start by hand, then use your wrench to tighten it. 22 ft/lbs.
Screw the filter housing drain plug back in, again tighten with your allen key. Just 7.6 ft/lbs for this little guy
Double Check Everything
Make sure your filter housing, filter housing drain plug, and main oil pan drain plug are all back in, and secured tightly.
Refill with Oil
Start by unscrewing the oil fill cap. It is located at the top of the engine. It is the only hole in the engine cover. The cap screws about half a turn counter-clockwise.
Pour in approximately 4 quarts, then check the level. Mazda's spec puts the capacity at 4.25 qts. I find that 4.5 is still within range on the dip stick.

Re-install the oil fill cap and start the car. You can usually hear a change in sound after the short second that it takes to fill up the filter housing and get the fresh oil circulating. Let the oil circulate for ~30 seconds and re-check for leaks.
Reinstall the Belly Pan
If you're a sucker and didn't cut a hole in your belly pan last time, then you'll need to re-install it now. Make sure you put all the bolts back in place, remember there's 7 of them and 2 plastic fasteners at the front corners.
You're Done, Clean up
You're a winner, you deserve an ice cream or a cold beer. Maybe both? Clean up, set your used oil aside for recycling, and celebrate.
There are 1 Comments.
Say Something.Nice article. Makes one wonder why Mazda does not relocate the belly pan hole so its under the filter.
You have to log in to comment...
We'll publish your comment after you're logged in.
Written by:iturgeon
Related HowTune Articles
Written by:iturgeon
Replace the Passenger Side Motor Mount
Written by:iturgeon
Replace the Roof Mounted Radio Antenna
Written by:iturgeon
Replace the Air Filter
Written by:iturgeon
Replacing Spark Plugs
Written by:iturgeon
Changing the Cabin Air Filter
Get notified about new articles.
We don't sell or share your info.