Changing The Cabin Air Filter on a Mazda3

The 2004-2009 Mazda 3 a/c cabin air filters are scheduled to be changed every 20,000 miles and they are hidden sort of deep in the dash.
Many early models like the 2004, and 2005 didn't come with filters, however they can be installed in those years too. I didn't find this out until I took the whole dash apart, so it was a bit of a surprise to pull out those empty plastic trays.
If your Mazda 3 a/c has a funky smell it's possible that your filter needs to be replaced.
For the 2010-2012 Mazda3, this is much simpler. The filter is located in the same area, however you do not have to remove the glove box or fuse panel.
- Phillips Screwdriver
- Ratchet Set with 12mm and 10mm sockets
- 2004-2009 Mazda 3 Cabin Air Filter:
- 2010-2012 Mazda 3 Cabin Air Filter:
Disconnect the Battery
Open the hood, pop off the battery cover, and disconnect one of the battery terminals using a 10mm wrench or socket.
Remove The Glovebox
For some, this may be optional. If this is your first rodeo with the Mazda 3's air filter, I'd advise you remove the glove box.
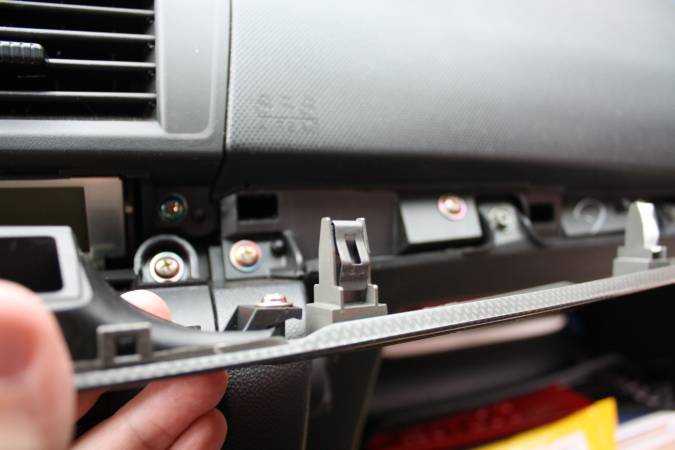
Start by removing the fancy dash trim panel. Gently pry it using your fingers, start at the center of the panel, working toward the driver's side. The clips should pull straight out of the dash.
The far end on the passenger side doesn't pull straight out - it has a hook that slides out toward the driver's side (See step 3 below)


Empty the glovebox and pull it off. It'll require a little effort, but it will pull straight out of the dash. There are a few clips that keep it in place.
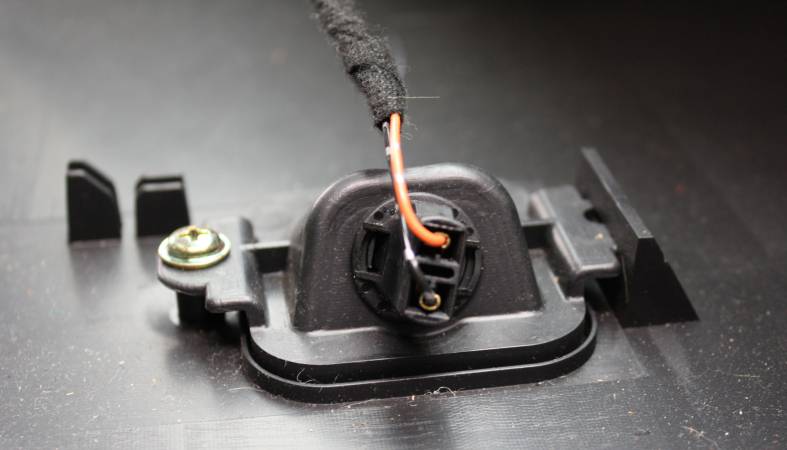
Make sure you disconnect the glove box light before you pull the box out.

Here's the glove box light, squeeze those tiny little prongs inside toward the bulb using a small flat head screw driver or similar.
Remove the Fuse Panel Cover
This little cover is easy to remove, there are two little finger clips toward the front on each side. Gently squeeze and pull the panel off.

Loosen the Fuse Panel
The fuse panel has 2 large plastic hand screws at each corner, loosen them and the panel will swing down.
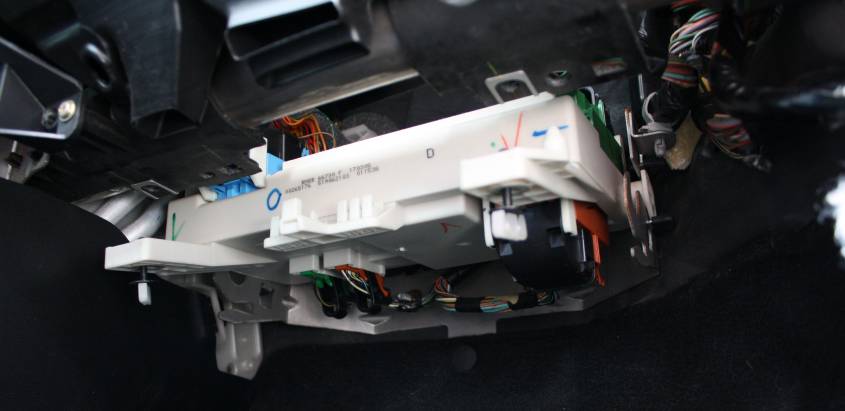
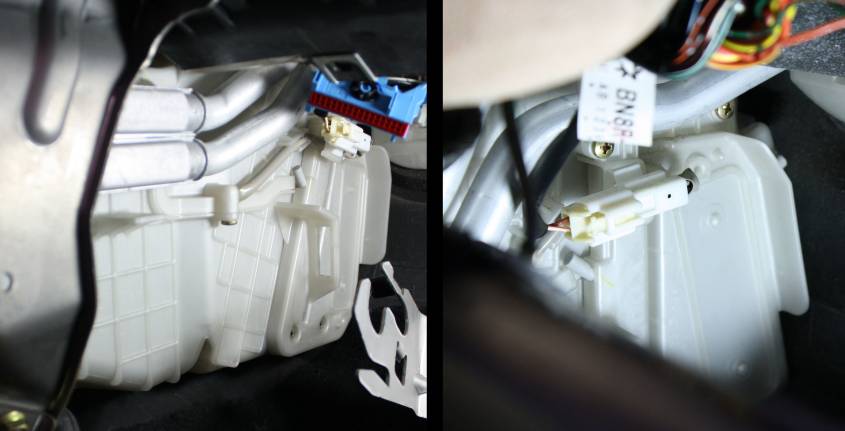
Carefully Disconnect the Fuse Panel
The fuse panel has 3 large and 3 small wire harnesses connected to it. We need to disconnect them to remove the panel.
The larger ones have a large plastic hinged shield that you'll have to rotate to disconnect them.


Remove the Fuse Panel
Remove the fuse panel all together. It's held in place by these simple little hinge pegs. Just slide them forward and up to get it out of the bracket.

Remove the Fuse Panel Bracket

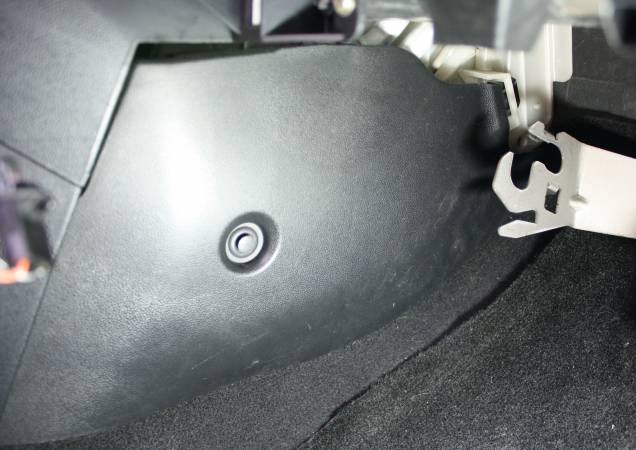
Remove the Inner Kick Panel
Remove the Cabin Air Filter Cover
Remove the 4 screws in the cabin air filter cover. There are 2 at the bottom and 2 on top.
You can leave the connector attached, we'll just move the panel out of the way.
Remove the old Fitlers
The filters come in 2 parts that sit vertically inside the box. Pull the first filter out by reaching into the hole and pulling on this tab.
The second filter will fall into the place of the first once it's out of the way. Pull it out too.

Install the new Filters

Install the kick panel trim. Slide the rear clip into the filter cover and install the plastic fastener.
Install the Fuse Panel
Install the 2 large and one small connectors on the top.
For the large ones, line them up on the fuse panel so that they sit as flat and even as they can. Then slowly close the hinge making sure it evenly goes back into place.
For the small ones, insert them into position and swing the hinge while pressing the connector into place. Make sure it seats fully into the socket. The plastic of the connector should not stick up past the plastic of the fuse panel.
Reconnect the battery
Make sure everything works
Those fuse panel connectors are crucial to everything on the car. If they don't get seated correctly, stuff goes wrong.
Mine thought the doors were open all the time and the A/C compressor wouldn't do anything (even though the light came on).
Turn the car on, test the lights, blinkers, dash lights, door ajar light and A/C.
If anything doesn't work, disconnect the battery again and quadruple check those fuse box connectors. Re-seat them and try again.
Install the Glove Box and Trim
Slide the box into place, watch the retaining clips on each side to see it sits in the right place. Also slide things around a bit so that the right side gets behind the trim panel properly.
There are 4 Comments.
Say Something.Great article, thanks! There's one slight modification I would suggest: If you have a socket wrench with an extension, you can start loosening the bolts that hold the fuse box bracket (step 13) before you actually start to remove the fuse box (step 9). The bolts are exposed as soon as you remove the fuse panel cover, mine were on very tightly, and it was a bit tricky getting at them with all the fuse panel wires dangling in the way. Similarly, you can just tighten those bolts "finger tight" when you reinstall the bracket for the fuse box, and then really tighten them once you've reinstalled the entire fuse box. I actually discovered this idea by accident when reinstalling. I forgot to fully tighten the bolts until after reinstalling the fuse box. Thankfully, I saw I could actually get at them. I was not looking forward to removing the fuse box again! Thanks again for the great article!
Great post - would have taken me all day without this article. Got it done in about 2 hours. Longest filter replacement job ever. Someone should strangle the Mechanical Engineers that designed this car.
The first time I changed mine on my 2008 Mazda 5(nearly identical to the 3) it took about four hours and was a very frustrating process. The second time I hired a mechanic to do it. The biggest problem is access. I did not remove the glove compartment. The hardest part was getting the upper filter to stay in place so I could slide the lower half in. You do not have enough hands. I finally used a small piece of tape to secure the right end up and that worked. This filter is very effective and I cannot imagine not having one. You may need to vacuum out the space their in, mine was full of leaves and debris. This is a really bad design by Mazda.Good luck.
Definitely seems like this is one of the harder cabin filters out there. Glad I could help you guys, and thanks for checking in!
You have to log in to comment...
We'll publish your comment after you're logged in.
Written by:iturgeon
Related HowTune Articles
Written by:iturgeon
Changing the Oil
Written by:iturgeon
Replace the Air Filter
Written by:iturgeon
Replace the Roof Mounted Radio Antenna
Written by:iturgeon
Replace the Passenger Side Motor Mount
Written by:iturgeon
Cleaning the MAF Sensor
Get notified about new articles.
We don't sell or share your info.