Replace The Passenger Side Motor Mount on a Mazda 3 and Mazda 5 2.3
The 2.3l passenger side motor mount (aka right front or PMM) is a very common failure. The motor mount has a fluid filled center to dampen engine vibrations. Unfortunately they crack, fail, and ooze hydraulic fluid. Many with less then 50,000 miles of use.
I wanted to replace mine with a better mount, but didn't want to introduce any new unwanted vibrations. I searched for quite some time to find the best OEM replacement at a reasonable price. I found a unit that seems to be highly endorsed by those installing it, so I bit the bullet and was pleased with the results.
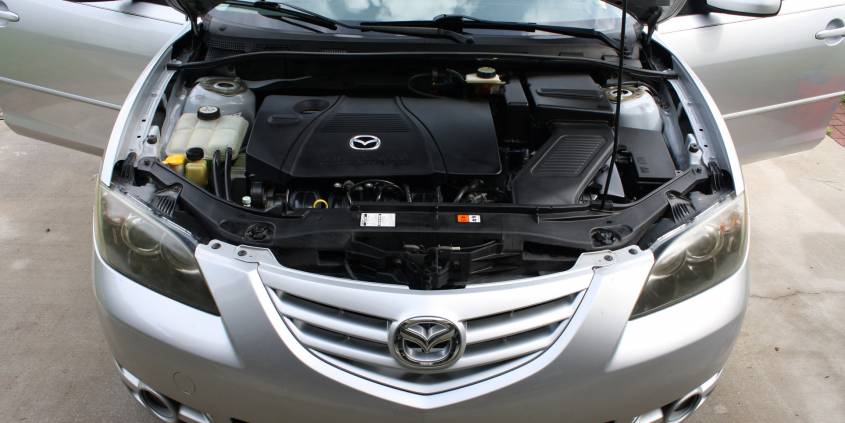
This article applies to the 2.3L engines powering the 2004-2009 Mazda3 and 2006-2009 Mazda5.
Pictures show a Mazda3, though a Mazda5 will be very similar
- Flat Head Screw Driver
- 17mm Deep Socket
- Breaker Bar
- Hydraulic Floor Jack or Engine Hoist
- Passenger Motor Mount Mazda #BCM4-39-060D, Beck/Arnley 104-2123, Roca #RC-EM0002A
You may experience any of the following:
- vibration noises on startup
- noises when driving over speed bumps, curbing, or bumps
- excessive wheel hop when driving hard
- vibration noises when starting the engine
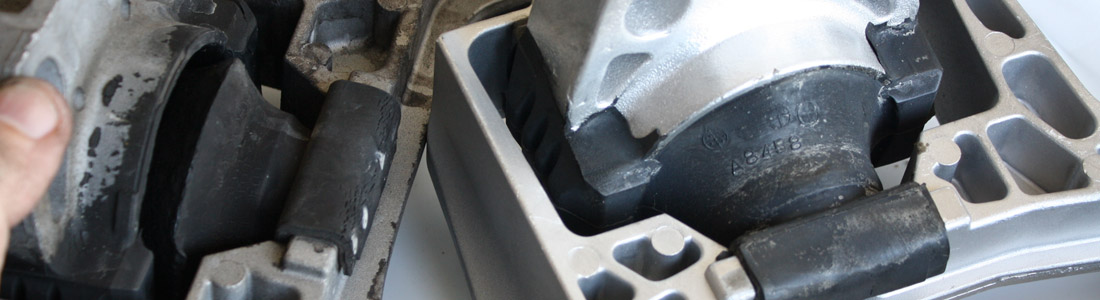
Check the Engine Mount
The number one easiest way to spot problems with the stock side motor mounts is the evidence of the hydraulic fluid seeping out of the mount. Often the dark fluid will stain the metal below the mount or even the hood above it.
Remove the Plastic Skid Plate
If you don't have an engine hoist, you'll need to support the engine from the bottom using a floor jack. Start by removing the skid plate. There are 7 bolts and 2 push-in fasteners. The sides in the wheel wells hook into the plastic of the wheel wells. Just be patient and use both hands to get them unhooked.
You can do this on the ground, but the picture below shows me using ramps for better photos.

Support Engine
If you have an engine hoist, use that to suspend the passenger side of the engine. There is a large hoist loop on the front passenger side near the corner where the mount is.
If you don't have a hoist, place a floor jack under the engine oil pan. Add anything you can to safely spread out the engine's weight across the pan. A 2x4 piece of wood is a common tool used here. My jack has a very wide rubber plinth on it, and it worked great as is.
Be very careful not to crack, bend, or damage the oil pan here as it will be supporting much of the engine's weight.

Remove the Engine Cover
Remove the Coolant Overflow Tank
The coolant tank is in the way. We only need to un-mount it, there is no need to disconnect any hoses. However it is somewhat tedious.
The tank is held in place by 2 clips, one at the rear and one and the front side. The clips are very difficult to unclip and put a great amount of strain on the overflow tank itself, so be careful as you wiggle and pull to not damage the overflow tank.

Basically, you'll have to get that little lip to slide back under the plastic. I used a flat head screw driver to pry open the clear plastic retainer on the tank to make room for the clip to pass over. This was by far what I spent the most time doing on this whole project.

Once the clips are free, wiggle and pull the overflow up off the clips. The clip I was most worried about was the front one. It seems like it would be quite easy to just snap it right off the overflow bottle which would likely crack and result in a very unhappy trip to the dealer for another. Go slow, be gentle.

Remove Engine Mount
Double check to make sure you engine support jack or hoist is in place.
Using a long breaker bar and a 17mm socket, loosen and remove the 2 bolts at the base of the engine mount.

At this point I made sure my jack was supporting the engine well enough to actually raise it a hair. Be very sure the engine is well balanced and secure before continuing.

Once the nuts are free you should be able to wiggle the mount out of the engine bay.
Notice the stained metal under the mount in the photo below, a tell-tale sign of a leaking engine mount.

Install New Engine Mount
Re-install the body mount bolts into the engine mount. I had to adjust my engine support slightly up to align the bolts correctly.
Remove Jack or Engine Hoist
Double check your engine mount bolts and remove the engine support once you're confident everything is back in place.
There are 7 Comments.
Say Something.Would be nice to have a guide for replacing the Rear Motor Mount also.
Thanks for such detailed description. I followed exactly these steps and got my mount replaced. It was concerned of cracking the oil pan when lifting the engine from below, but I did as described, using a 2x4 between the jack and the oil pan cover right under the oil pan screw. I can't believe the noise that the old worn off mount was causing. The car rides smooth now. A 30 minute work + the part (I bought the Beck/Arnley 104-2123 for $75). Good save.
Awesome @CarlM5! Yea, always need to be extra cautious with supporting the engine by the oil pan, but I think it's relatively safe if you're cautious and make sure you spread out the force effectively.
Check all the other mounts while doing this. I have had the drivers side fail 3x dropping the engine, and pulling the CVC axle apart. It's disastrous. I'm now repairing the rear motor mount. Don't buy a Mazda, I work on it more than I drive it.
"This article applies to the 2.3L engines powering the 2004-2009 Mazda3 and 2006-2019 Mazda5."
Is this a typo or does this apply to my 2013 Mazda5 too? The parts on Amazon listed look the same as what I have on my motor, but parts guide says they're incompatible. Searching for 2013 mounts results in nothing that looks similar.
You're right, I'll fix the typo.
Outstanding instructions, hats off. Question, does the same procedure pertain to Mazda5, 2015 2.5l engine? Thanks
You have to log in to comment...
We'll publish your comment after you're logged in.
Written by:iturgeon
Related HowTune Articles
Written by:iturgeon
Changing the Oil
Written by:iturgeon
Replace the Roof Mounted Radio Antenna
Written by:iturgeon
Replace the Air Filter
Written by:iturgeon
Changing the Cabin Air Filter
Written by:iturgeon
Replacing Spark Plugs
Get notified about new articles.
We don't sell or share your info.