Install The I Jdmtoy Led Side Markers on a 2006-2014 Mini Cooper

The mini cooper is a car that’s small, agile, quick, and convenient for city driving but the problem with the car is that many people drive them. A quick and simple way for you to stand out from all the other mini coopers is with our iJDMTOY MINI Cooper LED Sidemarkers. This will make your your car look much better especially if you have the tacky OEM yellow side marker lights.
With the hood opened, slide the whole side marker towards the front of the car so that you can take it off the car.


Pull the tab that is indicated away from the bulb holder and remove the side marker light. Directly replace the OEM light bulb with the new LED and install the new smoked lens side marker. Test to make sure the LED’s are working properly and then put everything back together.


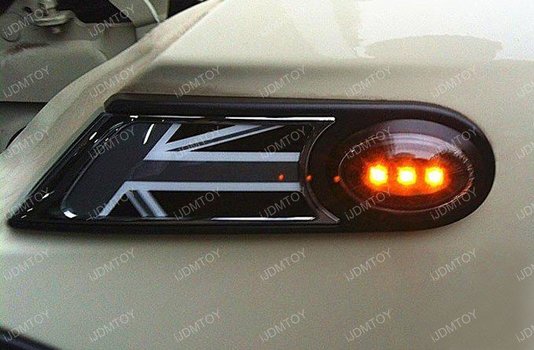
As you can see this was a very simple install and should only take a few minutes to do. This MINI Cooper Side Marker LED Lamps will create a different look to you Mini Cooper and will make the car that much more aggressive.
There are 0 Comments.
Say Something.You have to log in to comment...
We'll publish your comment after you're logged in.
Written by:ijdmtoy
Related HowTune Articles
Written by:ijdmtoy
Install the LED Daytime Running Lights Fog Lamps
Written by:iturgeon
Install Bosch Icon Wiper Blades
Written by:ijdmtoy
Install the iJDMTOY LED Light Bar
Written by:BagOfArms
Replace the Air Filter
Written by:ijdmtoy
Install the Lower Bumper License Bracket
Get notified about new articles.
We don't sell or share your info.