Replace The Door Handle on a 2011 Chevrolet HHR

If you have kids, you may be familiar with the phrase - "...your going to rip my door handle off..." You're smiling right now nodding your head agreeing with me. Yeah, well...in my case, my kids did just that. The 2006-2011 Chevy HHR's door handles are made from chrome covered plastic, and because of this they are prone to crack at the hinge point and break. The fix is quite simple needing only a few basic tools and about 15 minutes of your time. This article covers the replacement of the passenger side door handle of the 2006-2011 Chevy HHR. This article can apply to the driver side as well with the only difference in the door electrical connections to the windows and locks. Both handles are removed and attached in the exact same manner.
- T-30 Torx Screwdriver (or bit)
- Needle Nose Pliers
- Cutting Dikes
- Panel Clip Remover (optional, but it does make the job slightly easier)
- Flat head screwdriver (in place of the panel clip remover)
- Rag to protect paint

Here is our broken passenger side door handle. You can see where it simply just broke in half. The driver side handle attaches in the same manner, so you can use the same directions to replace it too. The electrical connections on the door may differ, but the handle itself is removed and replaced in the same way.

REMOVING THE DOOR PANEL
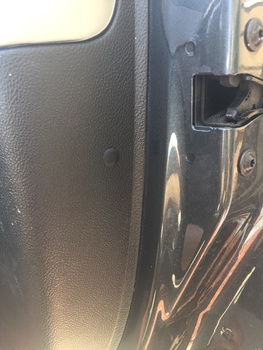
Begin by removing the clip on the rear side of the door panel. Simply push the center of the clip inward and use a flathead screwdriver to carefully pry it out.

Using a T-30 Torx screwdriver or bit, remove the 2 screws inside the arm rest (you may need to remove the rubber piece that lays inside the arm rest cup).

Now, behind the door handle, remove the plate cover to reveal another T-30 torx screw. Remove this screw.


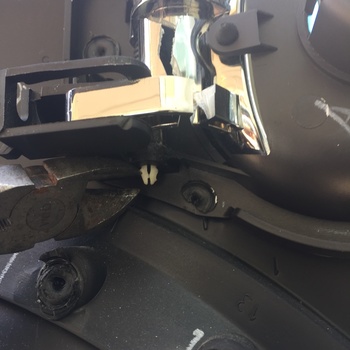
There are panel clips that hold the door panel around the bottom, sides, and near the top section. Using your panel clip pry removal tool, start at the bottom corner and begin to remove each clip. Using a rag behind the pry bar will help protect your paint.
If you do not own a clip pry bar tool, you can use a screw driver in it's place. Go slow as to not break the clips.

With all of the clips undone, you can now remove the door panel from the door. Be sure to clear the panel of the door lock pin on top. At this point, unclip the electrical connections as well at the door latch connection (the braided metal wire going to the handle).

REMOVING THE DOOR HANDLE
Here is the backside of the door handle. You can clearly see the broken handle. Our kit comes with a new handle, metal pin with c-clip (GM uses a plastic pin) and spring.

Because our kit comes with a new metal pin, we need to cut the bottom of the plastic pin to remove it. Using a pair of cutting dikes, snip the bottom section of the pin off. You can then slide it upwards to remove and discard it into the trash.
Next, remove the spring. You can use a flathead screwdriver to push it back out of the retainer bracket or you simply your use your fingers.

With the spring removed, you can now remove the broken handle. It'll probably fall out in pieces like mine did. You can discard the spring and handle at this point.

INSTALLING NEW HANDLE

Take your new handle and from the front side of the door panel, insert it into the slot. I found if you turn the handle on its side and rotate it starting with the bottom of the handle going in first, it will go into the panel with ease.

With the handle in place, place the new spring in position. Note the orientation of the spring in the picture to ensure you are installing it correctly. The top portion of the spring will be mounted BEHIND the door handle where my index finger is. DO NOT try to pry the bottom section of the spring into the retainer, as the next step will make life easier...

Take the metal pin and slide it into place from the top. Be sure it engages into the door handle and throw the center of the spring and into the bottom of the door handle and out the bottom. With the pin now in place, you can now put the bottom portion of the spring into the retainer.

The metal pin helps hold the spring in place, otherwise it wants to "spring" out making you go hunting in your garage for it.
Using a pair of needle nose pliers, take the c-clip and insert it into the bottom of the metal pin. The bottom portion of the pin is made to accept the clip.

Your new handle is now properly installed into the door panel. You can give it a few quick pulls to ensure it functions properly and springs back into place.
You can now reinstall the door panel back into the door. Reconnect all electric connections as well as reinserting the door handle latch connector (braided metal line).
With all the connectors back in place, align the door panel back to the door (making sure you thread the door lock pin on top back into its hole and onto the top row of clips along the bottom of the window) and give the panel a few firm open handed hits to pop the clips back into their respective mounts.
Install the 3 torx bolts located behind the handle (along with its cover) and into the arm rest cup.
Install the plastic clip on the back section of the door by pushing the center pin completely out, inserting the clip back into the door panel, then reinserting the center pin back into the clip.
Jump in your car, and shut the door. Now open it. Congratulations, you can now use your door again without having to have someone let you out or rolling down the window to let yourself out. Life is good!
This is a relatively easy fix that doesn't require expensive tools or fancy equipment. The total cost of this repair was $18 and 15 minutes of my time. There are alternative door handle kits available that come fully loaded with the handle already set into its housing that attaches to the door panel, but these kits can run $30+ and are unnecessary to get the job done if only your handle is broken.
There are 0 Comments.
Say Something.You have to log in to comment...
We'll publish your comment after you're logged in.
Written by:syo237
Related HowTune Articles
Written by:syo237
Change the Spark Plugs
Written by:syo237
Changing the Air Filter
Written by:syo237
Change the Headlight Bulb
Written by:syo237
Replace the Front Brake Pads
Written by:syo237
Change the Cabin Air Filter
Get notified about new articles.
We don't sell or share your info.