Replace The Spark Plugs on a Honda S2000
Honda s2000 spark plugs are very easy to change. This guide covers how to install, tools you need, and part numbers for your spark plugs. The AP1 and AP2 use the same spark plug, so this article covers both the F20 and the F22c1 engines.
Spark plugs are an important regular maintenance item, especially for engines like the high-strung F20. They wear out over time, but can also be fouled very quickly depending on conditions inside you engine.
Changing plugs yourself is very easy, it's a good beginner's project. Saving an hour of dealership labor fees, you should be able to buy the tools for less then you'd pay someone else to do the work.
Honda's official maintenance schedule for replacing the spark plugs is every 100k miles or 7 years. Though many forum members find benefit changing them as early as 50k miles.
- 5mm Allen Key
- Ratchet Set with 10mm socket
- 5/8" Spark Plug Socket, Wrench, and extensions
- Wire Spark Plug Gap Tool
- Optional Torque Wrench (you can use NGK's instructions instead of torque)
- 4 x Spark Plugs OEM: NGK PFR7G-11S or Upgrade to Iridium: NGK IFR7G-11KS
- Dielectric Grease
Remove Spark Plug Cover
Remove Ignition Coils
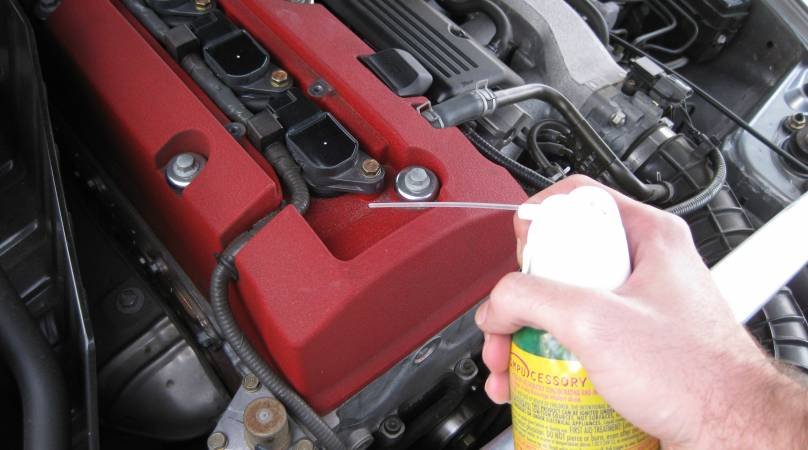
Clean loose dirt from the coil area to prevent it from dropping into the spark plug holes. An air compressor or can of compressed air would be useful here.
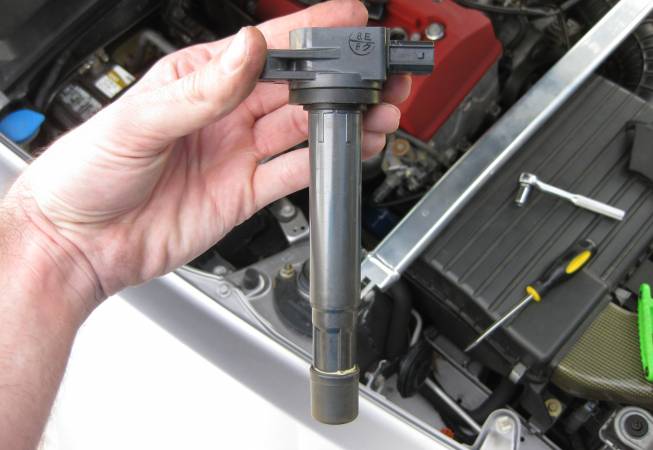
To unplug the ignition coils, you need to lift them out of the engine slightly. First, pull up on the coil to separate it from the spark plug.
Once the coil is high enough to rotate without hitting the valve cover, you can disconnect it from the wire harness. Remove the connector by pressing in the release clip, wiggling it loose from the coil, and rotating the coil away from the connector once it's loose.
Remove Spark Plugs
Again, clean loose dirt from the area to prevent it from getting down into the spark plug holes. Use compressed air.
Check Spark Plug Gap
With the iridium and platinum plugs I linked to above, don't use the traditional wedge/coin style gap tools. Fragile tips will break, so you have to use the feeler or wire style tools that have tools for bending the side electrode without contacting the fragile iridium center tip.
The new plugs come pre-gapped, so you shouldn't need to adjust them. This step is just to assure that they are correct.
Using a feeler gauge, check the gap on all of your new spark plugs. Gap should be set at 0.039 - 0.043 in.
Install Spark Plugs
Install each spark plug. Do not use anti-seize on NGK spark plugs. NGK (and most others) use a special (Trivalent) plating that does not require anti-seize. Also, anti-seize will affect the torque rating used to tighten them.
My favorite trick to keep from cross threading a plug into the cylinder head is to use a rubber or silicone hose pushed onto the end of the spark plug. The hose will allow you to more easily feel the correct thread engagement of the spark plug then using a wrench would. And, ideally the hose won't grip the plug as strongly, so if you do mis-thread it, you won't be able to tighten it enough to cause damage to the cylinder head.
Tighten each to spark plug using the method described in NGK's instructions.
- New Plugs: seat the plug, then turn 1/2 to 2/3 of a rotation (180-240 degrees).
- Reusing Plugs: seat the plug, then turn 1/12 of a rotation (30 degrees).
Torque is critical to spark plug functionality. Too loose and it won't dissipate heat properly, too tight and it can break.
Install Ignition Coils
Slide the coil pack back down into the spark plug shaft and connect the wire harness to the ignition coil.
You may wish to add dielectric grease on the coil boots where they slide over the spark plugs.
Test Ignition Operation
Test the car before going any further. Start the car once you've changed all the plugs, re-installed the coils, and bolted the coil packs back onto the valve cover. If the car starts and idles fine, shut it off and finish the install.


There are 0 Comments.
Say Something.You have to log in to comment...
We'll publish your comment after you're logged in.
Written by:iturgeon
Related HowTune Articles
Written by:zachberry
Replace the Air Filter
Written by:zachberry
Change the Front Brake Pads
Written by:zachberry
Change the Transmission Fluid
Written by:zachberry
Replacing the Slave Cylinder
Written by:zachberry
Fix the Brake Lights Stuck On (or Broken Cruise Control)
Get notified about new articles.
We don't sell or share your info.