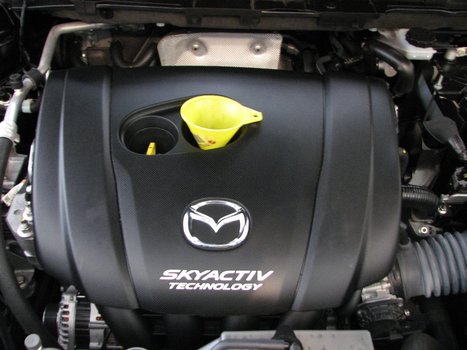
Change The Oil on a 2016 Mazda CX-5
Learn how to change the oil on your Mazda CX-5 with a 2.5L engine. We've got a step by step how-to with all the parts and tools you'll need.
Mazda calls for an oil change every 5,000 miles under normal use.
- Oil Filter Wrench
- Ratchet with 8mm hex or Allen wrench.
- Oil Catch Pan
- Oil fill funnel
- Hydraulic Jack and Jack Stands
- Flat head and philips screwdrivers (Optional rivet puller; Optional 8mm socket).
- [4.5 quarts of 0W-20](https://www.amazon.com/Mobil-Advanced-Synthetic-Motor-4-73L/dp/B00J00X5YO/ref=sr_1_1?ie=UTF8&qid=1466549347&sr=8-1&keywords=0W-20+synthetic&tag=hotu0c1-20 weight synthetic oil. Note 1: Because of the relatively high 13:1 compression ratio (and tight tolerances) of this SkyActiv motor, it's important that the specified weight oil be used with no variation. Note 2: I've found Walmart to be the cheapest source for Mobile 1 oil.
- Oil Filter - Bosch 3300, Fram PH6607, Royal Purple 10-2876, Mazda PE01-14-302A, Purolator PL14612 Purolator PSL14612 (10k mile), WIX Filters - 57002
- Replacement Oil Drain Crush Washer 9956-41-400. Note 1: If you have the replacement washer available, use it. But it is usually possible to re-use the existing washer if necessary.
Get Started by Lifting the Car
Lift the front of the vehicle using your jack and jack stands.
This is a unibody style vehicle, with the lift points along the outer 'pinch weld' of the frame. You'll see a slight cutout section indicating the proper jack position. Please refer to the Mazda Owners manual for additional information, as needed.
Remove The Under Tray
The oil pan access panel is the second one from the front of the vehicle on the passenger side, as shown in the image below. Use a flat head screwdriver or rivet remover to remove the plastic pop rivet located at position A. Next remove the two 8mm bolts at location B using a small ratchet and socket or a Philips screwdriver.
Drain the Oil
Remove the oil filter using your favorite type of filter wrench. Note: If you don't have a filter wrench, often the filter may be unscrewed by hand.
Pre-fill the new filter with oil using a funnel and moisten the rubber contact gasket with oil. This procedure helps prevent a temporary dry start during the initial startup, and lubricating the contact seal helps provide a leak-free seal.
Screw the new filter on, tightening it per the instructions on the box.
Typically seat the gasket and tighten another 1/2 or 3/4 turn by hand or wrench.
Fill with New Oil
Using your funnel, refill the oil. It takes approximately 4.5 quarts. Have a clean rag available to wipe up any spills.
Note: Since it's easier to add oil than to drain excess oil from the pan, I usually stop filling at about 4.2 quarts. Add additional oil as necessary and repeat until the oil is at the proper level.
Check the oil level by removing the dip stick, drying it and re-inserting it.
Check the level by reading where the oil shows up on the end.
Finish Up
Re-install the skid plate by tucking the front lip of the plastic panel under the adjacent panel, then secure the plastic rivet on the opposite side. Then secure the two 8mm bolts.
Resetting the Oil Service Light
There is a special procedure to reset the oil service light. On the display panel, use the rotating selection knob to highlight the "Applications" icon and select it. Next highlight the "Maintenance" entry and select it. Then highlight the "Reset" entry and select it.
##How to Get Rid of Your Old Oil?##
Your local auto parts store will take your old oil as long as you don't mix it with any other fluids.


There are 0 Comments.
Say Something.You have to log in to comment...
We'll publish your comment after you're logged in.
Written by:RobT
Related HowTune Articles
Written by:iturgeon
Change the Cabin Air Filter
Written by:RobT
Configure Bluetooth Settings for the iPhone
Written by:iturgeon
Change the Engine Air Filter
Written by:RobT
Repair the Accessory Socket
Written by:iturgeon
Replace the Key Fob Battery
Get notified about new articles.
We don't sell or share your info.