Clean Or Replace The Maf Sensor on a 3.7l V6 Ford Mustang

This article shows you how to clean or replace a Mass Air Flow (MAF) sensor on a 2011, 2012, 2013, 2014, and 2015 v6 Mustang.
The MAF sensor is used to measure intake air volume for use in calculations to determine fuel and timing.
Over time debris in the air builds up on the MAF sensor wires, and need to be cleaned. Cleaning them is very quick and painless, just be sure to use the proper chemicals.
Note: Just a warning for other car models. If your car has a Karman Vortex style MAF, it cannot be cleaned. Karman Vortex MAF's are constructed quite differently and are generally easy to identify. They are used on Toyota Supra Turbos, Mitsubishi and most Lexus vehicles.
- MAF Sensor Cleaner
- Replacement MAF Sensor Ford 12B579 (AFLS-165)
Pop The Hood

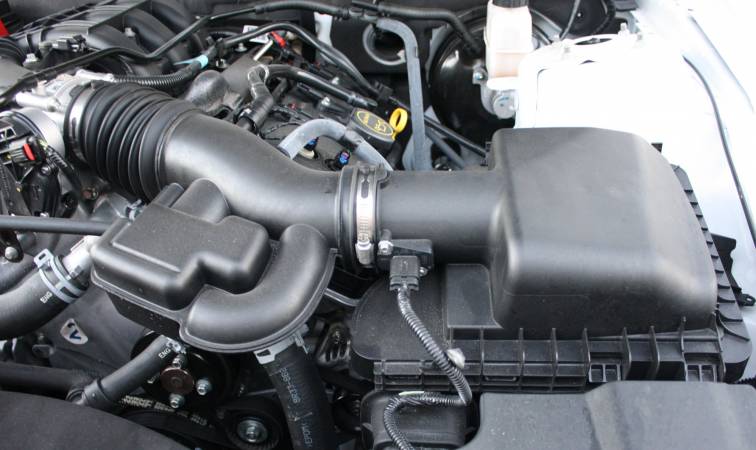
Locate the Mass Air Flow Sensor
The MAF Sensor is located on the intake tubing after the air filter. The MAF on the stock air box is easy to see, as it's right on the front.
Remove Torx Screws
There are 2 x T-20 Torx screws holding the sensor in place. Remove them and place them somewhere safe, you'll be reusing them.

Optionally remove Electrical Connector
If you wish, you can remove the sensor from the connector now. I find it easier to do this after unscrewing the sensor because it's easier to see how the connector works.
Pull the red tab out, it slides a couple millimeters and stops.
With the red tab pulled out, you can now squeeze the locking pin down to pull the connector off.
Shown below is a gif of the same type of connector on a different sensor.

Clean the MAF Sensor
Spray the the MAF Sensor wires to clean off any particles or gunk that has built up. Feel free to spray into the sensor, be sure to spray the wires themselves. Only use MAF Sensor safe cleaner.
Do not mechanically clean the wires by rubbing or touching them.

There are 0 Comments.
Say Something.You have to log in to comment...
We'll publish your comment after you're logged in.
Written by:iturgeon
Related HowTune Articles
Written by:iturgeon
Change the Oil
Written by:Offthethrottle
Fixing the Suspension And Brakes
Written by:Travis Noonan
Replace the Radiator and Fan
Written by:iturgeon
Replace the Air Filter
Written by:iturgeon
Change the Engine Air Filter
Get notified about new articles.
We don't sell or share your info.