Change The Oil And Filter on a Scion FR-S and Subaru BRZ

Any self-respecting gear head should know how to change their own oil. This guide will teach you how to change your FT86's (Scion FR-S / Subaru BRZ) oil. We've got links to all the tools, parts, oils, and optional upgrades you may want.
Before you begin, research the Fumoto valve to see if you want one. Also figure out what oil brand and oil filter you want to buy.
Fumoto Valve Benefits
- No more worry of stripping the the drain plug threads every oil change.
- No more crush washer replacements
- No tools needed to drain the oil
- No oil covering your hand when you pull the plug out
- An easy way to direct oil into the catch pan.
Fumuto Valve Cons/Downsides
- You need to be careful about hitting it on things (the 86's skid plate should still protect it)
- Engine failure metal bits floating around in the pan may not come out, but you have other issues if this happens.
- Your jerk friends could drain your oil (if they can reach it)
- Oil Filter Wrench: Universal strap type or a 80mm 15 flute for the Subaru 130 filter
- 14mm socket and wrench set
- Oil Drain Pan
- Funnel
- 5.8 quarts of 0w20 oil: Mobil1 0w20
- Oil Filter: Subaru 15208AA130, Mobil M1-104 or M1-104A, Bosch 3312 Royal Purple 10-2808, Wix 57830, FRAM XG9688
- Oil drain plug crush washer Subaru 803916010
- Optional Upgrade Fumoto Drain Valve F-108S or F-108 (F-108N may be just a tad long)
- Optional Upgrade GReddy Magnetic oil plug 13901304 or DIMPLE magnetic plugs
- Optional Replacement oil drain plugs are M16x1.5x12
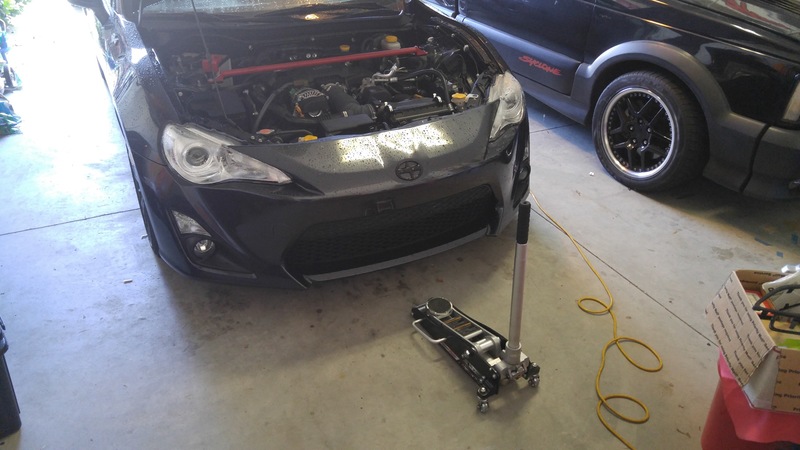
Raise The Front End
Drain the Oil

Remove the oil drain plug using a 14mm socket.
Note: The first oil change on most Subaru's requires quite a bit of torque to loosen this bolt because the plug and oil pan are painted together. Remember: righty-tighty, lefty-loosey.

Drain the oil into your oil catch can.
I, of course, missed the catch can got oil everywhere. This, this is exactly why you'd want to install a Fumoto Valve.

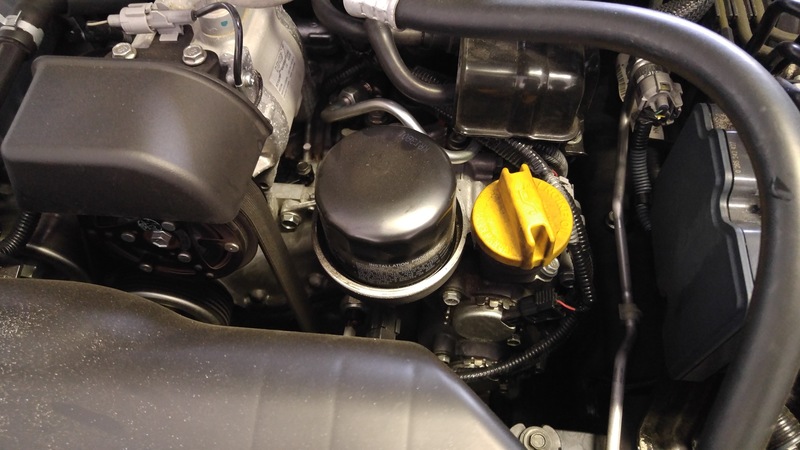
Remove the Oil Filter
While the oil is draining, let's remove the oil filter.
The filter can be removed with the normal cap type filter tool or a band type.
If you have a band type, you'll need to either remove the oil fill cap or air filter to gain enough room for the tool.
Spin the oil filter off by rotating it counter clock wise.
As you can see, I opened up the air filter box to gain room for the oil filter strap wrench.

Optionally clean the oil filter sealing surface.
Be VERY careful not to get any of this dirt into the inside of the filter housing. The FR-S/BRZ oil filter does not have an enclosed housing, so a lot of junk builds up on the inside lip of the oil filter housing.

Install a New Oil Filter


Install and Tighten the Oil Drain Plug
Back under the car, the oil should be dripping slowly at this point.
Wipe the oil drain plug surface clean to remove any dirt or grit that can cause damage or sealing issues over time.
Install a new crush washer and screw the drain plug back on. Note: the stock drain plug has a crush washer stuck to it (pictured). You have to remove it before adding a new crush washer.
If you are installing a new Fumoto valve, install the valve and gasket it comes with now.

Tighten the stock drain plug using your 14mm socket.
The oil drain plug torque is 40N·m or 29 ft·lbf
Wipe the oil pan, skid plate, and the oily mess you made.
Pull your drain pan out from under the car.
Refill with Oil


Pour in the remaining oil. You'll put a total of 5 - 5.8 quarts of 0w20 oil depending on how much you were able to drain.

There are 2 Comments.
Say Something.This was extremely helpful! I used this page from start to finish even when I purchased the supplies needed. Thank you to the person who took the time to create this page!!!
@MarcieM - thanks for the feedback & glad I could help.
You have to log in to comment...
We'll publish your comment after you're logged in.
Written by:iturgeon
Related HowTune Articles
Written by:iturgeon
Install Bosch Icon Wiper Blades
Written by:ijdmtoy
Install a Valenti-Style LED Backup Light
Written by:BagOfArms
Adjusting the Clutch Pedal
Written by:BagOfArms
Replace the Rear Turn Signal Bulbs
Written by:iturgeon
Replace the Wheel Studs
Get notified about new articles.
We don't sell or share your info.